6 Tips for Tying Better Flies
Fly tying is a craft, and like any craft, you don’t start out an expert. It takes plenty of trial and error to improve your skills. And while most of us may never earn the title Master Tyer, there are a few things you can do today to become more proficient. Here are six tips that will help you produce better-looking flies right now, regardless of skill level.
1. Less is more, especially when it comes to dubbing.
One of the biggest mistakes new tyers make is using too much material. In reality, most insect bodies are rather skinny. To imitate the naturals, just a pinch of dubbing is usually all it takes to get the job done, and by pinch, we’re talking not much more than enough to cover the thread. As someone once told me, “God don’t make fat mayflies.”
Properly-sized bodies on dry flies can mean the difference between a take and a refusal. Unless you’re fishing big, meaty search patterns such as Stimulators or Madam X’s, sparser dressings will almost always perform best. You can get away with slightly bulkier flies when chucking streamers or nymphing, but even when nymphing, I seem to do better with sparser ties, particularly on hard-fished waters.
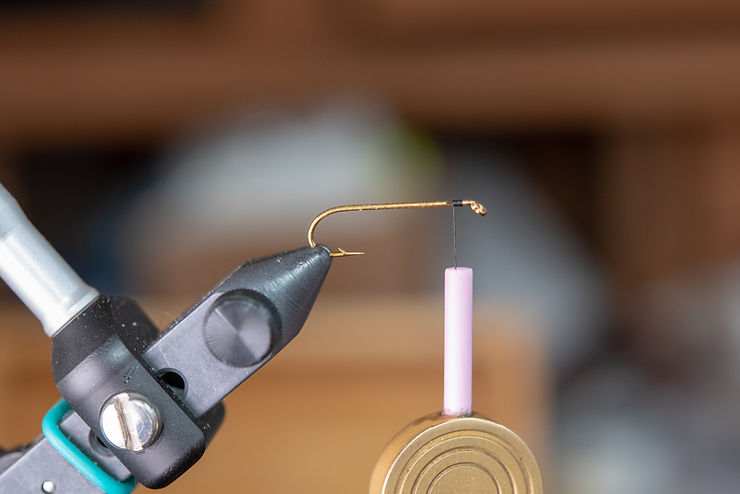
2. Don’t crowd the eye of the hook.
A common mistake, starting out, is to wrap the hackle or dubbing all the way up to the eye of the hook. This makes finishing the fly difficult and results in an awkward-looking product with an over-sized, messy head. Also, if you’re not careful with your thread wraps you can block off part of the eye, which makes it difficult to poke a tippet through smaller hook eyes. This is especially easy to do when tying Catskill-style dry flies, soft hackle patterns, or anything that involves winding a hackle as the last step before finishing.
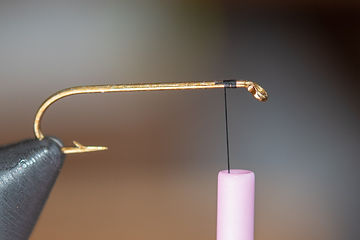
A great tip I learned from watching a Kelly Galloup fly tying tutorial is to begin your fly at the same place on the hook shank as where you want it to end. So in order to make sure there’s enough head space behind the hook eye, leave a small gap between the eye and where you start your thread on the hook. This will serve as a visual reminder of where the hackle, dubbing, or other material must end in order to provide enough room to finish the fly.
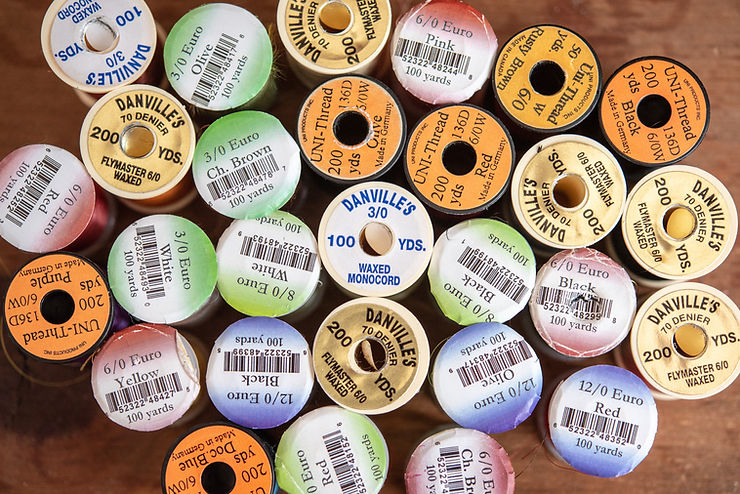
3. Thread diameter matters.
My dry flies started looking better as soon as I dropped my thread down one size. Even 6/0 thread can be bulky, and when you’re tying on hooks size 12 and smaller, the thread adds extra mass to the pattern. If you’re having trouble getting those skinny bodies on your Catskill-style flies, for instance, try dropping down to an 8/0 or even 12/0 thread. At first, you may break off more frequently, but that’s likely because you’re used to the heavier thread, not because the 8/0 or 12/0 is too light. It doesn’t take much tension to secure materials. Remember, you’re not strapping down cargo on the back of a flatbed truck. Often, the weight of the bobbin hanging down is enough to hold the materials in place.
Comparatively speaking, the threads manufactured today are much stronger and have higher breaking points than threads did years ago. Whereas 6/0 used to be the “standard” size for most patterns, I more often use 8/0, and the only time I go heavier is when I’m tying large nymphs (size 10 or bigger) or streamer patterns where I have to apply more tension to securely attach bulkier materials to the hook.
4. Pay attention to proportions.
If you get to the end and the fly just doesn’t look right, it’s probably because your proportions are out of whack. Learning proper proportions takes some time, but the more you study insects, the more you’ll start seeing how their bodies are shaped.
Think of it as if you’re looking at a person. The hook shank is equivalent to a person’s height, and a certain amount of that height consists of legs, torso, and head – except in the insect world we call it the abdomen, thorax, and head. But just as if you were “putting together” a human being, when one feature is proportioned incorrectly, the whole thing looks weird.
A hook shank isn’t much room to work with, and it can be hard to figure out how to fit everything on it in the right position. I’ve always found it helpful to apply a rule of thirds when tying certain flies, visualizing where each section needs to end so that I have room for the next part. If it doesn’t look right, I start over. If I get to the hackle and find that the body is too long, I unwrap enough so that I can shorten it. There’s no harm in scrapping flies that don’t turn out right, or cutting off the materials and reusing the hook. It’s all part of the learning curve.
5. Take a class/watch videos.
There are some really excellent instructional videos on You Tube that demonstrate various tying techniques. Any time I want to learn how to tie a new pattern, one of the first things I do is search You Tube for help tying that pattern.
One of the advantages of living in the “information age” is the sheer amount of resources available to new tyers online. However, don’t underestimate the advantages of in-person instruction. A class provides hands-on lessons, but you also get to experience the comradery with others who are also learning these same skills. So, while you can learn by watching videos, you’ll have more fun and enjoy the learning process more by taking a class.
6. Patience and practice.
The toughest part of tying flies is patience. Don’t try to rush the process, and don’t get frustrated when your first attempts don’t look so great. Nobody starts out as a master, but fortunately, fly tying seems like one of those crafts that you can become proficient at in a relatively short amount of time.
I’ve been tying for 25 years, and I still have to practice. Every time I decide to learn a new pattern, my first few examples can look sloppy. It takes two or three attempts until I get the proportions right. For this reason, I almost always tie up a half-dozen of a new pattern, just as practice, before I get in the flow and start churning out flies that look like they’re supposed to. No matter how long you’ve been tying, or how many flies you’ve tied, there’s always more to learn, always new skills to develop, and that’s what makes this hobby so interesting.
_________________
Have any advice to share? Login below to leave a comment. Your feedback is much appreciated!